
Istio service mesh helps DevOps engineers and architects manage the network and security of distributed applications, without touching the application code.
In a previous blog, we explained How to get started with Istio in Kubernetes in 5 steps, where Istio’s command line tool, Istioctl, is used to install Istio. Here, let us see the steps to install Istio using Helm chats.
Prerequisites
- Kubectl – Kubernetes command-line tool.
- Helm – Package manager for Kubernetes.
Steps to install Istio using Helm charts
There are three steps involved in the process, which should be done in the following order:
- Add Istio repository to Helm
- Install Istio base chart
- Install Istio control plane
After completing the above steps, we will see how to verify if they are installed properly.

Step #1: Add Istio repository to Helm
Istio repository contains the necessary configurations and Istio charts for installing Istio. The first step is to add it to Helm by running the command below.
helm repo add istio https://istio-release.storage.googleapis.com/chartsNow, update Helm repository to get the latest charts:
helm repo update
Step #2: Install Istio base chart
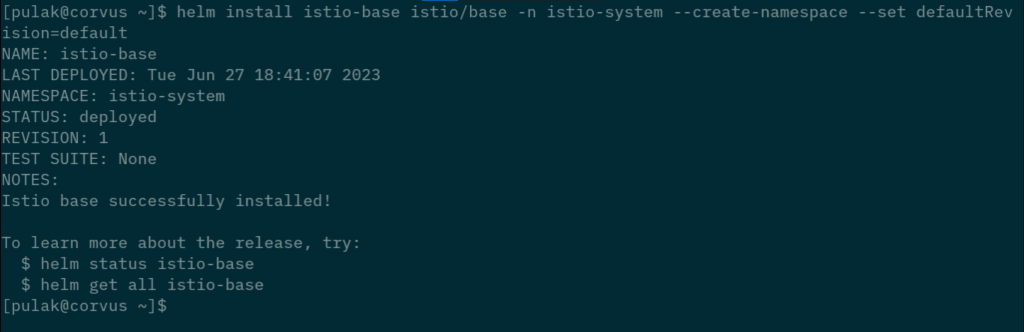
Enter the following command to install the Istio base chart, which contains cluster-wide Custom Resource Definitions (CRDs). (Note that this is a requirement for installing the Istio control plane.)
helm install istio-base istio/base -n istio-system --create-namespace --set defaultRevision=default- In the above command, `istio-base` and `istio/base` represent the chart name and the chart path, respectively.
- The chart will be installed in `istio-system` namespace. Since the namespace does not exist already, we passed the argument `–create-namespace` to create it. The namespace will set up the validator required for Istio.
- defaultRevision: As the Istio base chart sets up a `ValidatingWebhookConfiguration` to perform resource validation, it is necessary to select a default revision that will be used for validation. We will use the `default` revision here.
You will see the below output if the installation is successful.
Step #3: Install Istio control plane
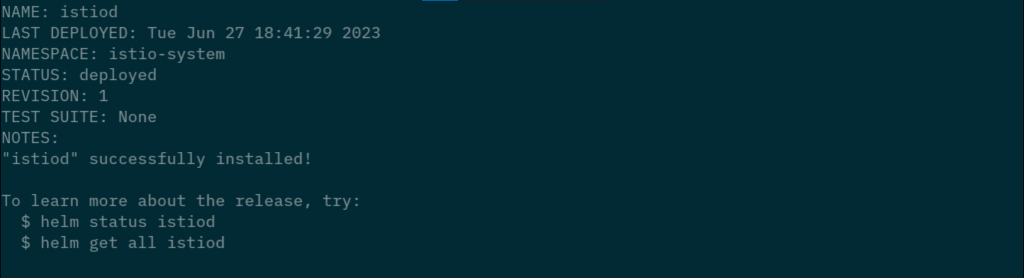
The below command will install the Istio control plane component, Istiod, into the `istio-system` namespace.
helm install istiod istio/istiod -n istio-system --waitUpon successful installation, it will return the following output:
Verify Istio base and Istiod deployment status
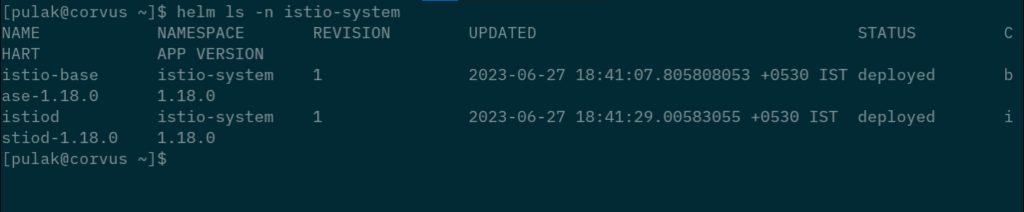
By running the following command, we can see the deployment status of istio-base and istiod.
helm ls -n istio-systemWe can see that the status is `deployed` for both of them in the output.
Also, run the following command to verify if it is actually running:
kubectl get deployments -n istio-system -o wideWe can see that the `istiod` service’s pod is running.

Video: Install Istio using Helm charts
Watch the following video to see all the above steps in action. There is an additional step in the video where istioctl command is used to do a pre-check while installing istio-base. However, note that this step is completely optional.
If you are deploying Istio in a production environment, it is highly recommended to talk to an Istio expert beforehand. Because Istio is complex, like Kubernetes. Many subtle errors can creep in while configuring service definitions or setting up Istio, particularly when you have applications deployed across multiple namespaces, written by developers with varying levels of experience.


magnificent publish, very informative. I ponder why the opposite
experts of this sector don’t realize this. You should continue
your writing. I am confident, you’ve a great readers’
base already!
Hi to every one, as I am actually eager of reading this web site’s post to be updated regularly.
It carries fastidious material.
Helpful information. Fortunate me I found your web site unintentionally,
and I’m shocked why this coincidence did
not happened in advance! I bookmarked it.
Hello! This is my first visit to your blog! We
are a team of volunteers and starting a new initiative
in a community in the same niche. Your blog provided us
beneficial information to work on. You have done a marvellous job!
Excellent article. Keep writing such kind of information on your page.
Im really impressed by your site.
Hey there, You have done a fantastic job. I’ll certainly digg it and individually recommend to my
friends. I’m confident they’ll be benefited from this site.
I really like looking through a post that can make people think.
Also, many thanks for allowing me to comment!
I am regular reader, how are you everybody?
This article posted at this site is really nice.
Appreciation to my father who stated to me about this website, this web site is really remarkable.