Applications nowadays are distributed as microservices all over the cloud. Organizations use Kubernetes to manage these applications at scale, which has brought great flexibility and agility for development teams.
However, microservices and multicloud applications have given rise to new challenges. Now, it is harder to configure communication between distributed services and secure the data in transit. So it is inevitable for organizations to use service mesh, specifically Istio. In this blog, we will briefly look at what Istio is and then see how to install Istio in Kubernetes in just 5 steps.
What is Istio service mesh?
Istio is a popular open-source service mesh implementation platform, which simplifies and secures communication between microservices in the cloud. Istio abstracts the network and security layer from the application and applies them from an infrastructure layer. It provides some major benefits, such as traffic management, security, and observability, for better control and visibility into the traffic flow between microservices.
Istio has two major components: a control plane and a data plane (refer to fig. A below). The data plane comprises a network of L4 and L7 proxies called Envoy, which intercepts and facilitates communication between services. Envoy proxy is injected as a sidecar to each application deployed in the mesh. The control plane acts as a centralized layer to manage and configure these data plane proxies.

Fig. A – Istio sidecar architecture
To learn more about Istio and delve into its architecture, features, and benefits, check out this blog: What is Istio Service Mesh | IMESH
Now, let us move on to how to deploy Istio in Kubernetes and see what the prerequisites are at first.
Prerequisite
- Kubernetes cluster v1.23 or later. The version used for implementation: v1.26.0
- Download Istio in a folder
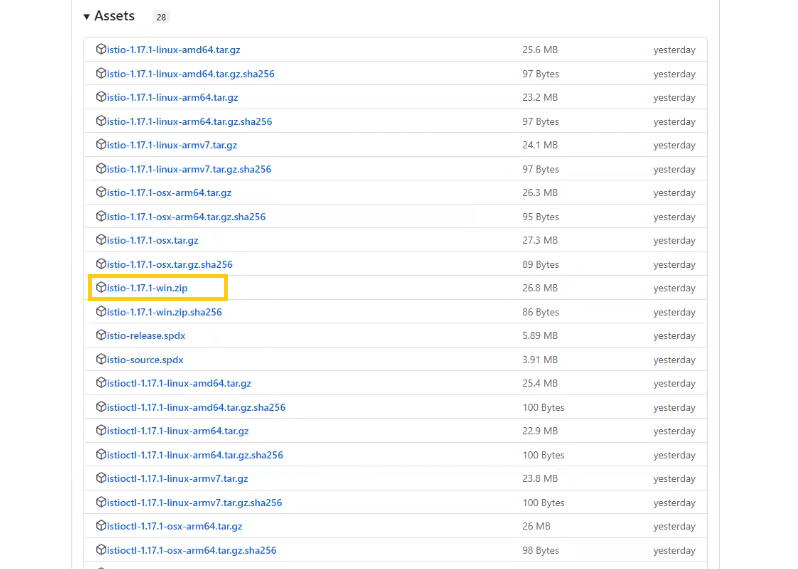
You can download the latest Istio version by going to this path based on your OS: https://github.com/istio/istio/releases/. For this demo, I have downloaded Istio 1.17.1 for Windows.
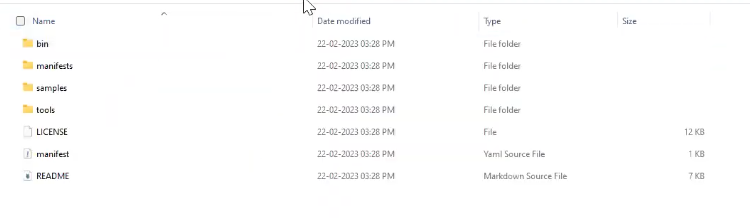
Once you download the zip file, extract it, and you will see the following files in Istio 1.17.1 folder:
After successfully extracting Istio files, open CMD and change the directory into the folder where the Istio files are extracted, to install it.
Note: Ensure
Watch the demo on how to install Istio in 10 mins
If you prefer watching the demo rather than reading through this blog, click on the below video to learn how to install Istio in 10 minutes:
Steps to install Istio service mesh, ingress gateway, and Kiali dashboard
We will follow the 5 steps outlined below to complete this tutorial:
- Step #1: Deploy Istio to Kubernetes
- Step #2: Prepare namespace to onboard Istio
- Step #3: Deploy demo application
- Step #4: Deploy ingress gateway and access application from outside the cluster
- Step #5: Visualize service graph using Kiali dashboard
Step #1: Deploy Istio to Kubernetes
Run the following command to deploy Istio to K8s with demo profile:
| istioctl install –set profile=demo -y |
It will install Istio core, Istiod, and Ingress and Egress gateways.
Step #2: Label namespace to onboard Istio
For Istio to inject sidecars, we need to label a particular namespace. Once a namespace is onboarded (or labeled) for Istio to manage, Istio will automatically inject the sidecar proxy (Envoy) to any application pods deployed into that namespace.
Use the below command to label the `default` namespace with the Istio injection enabled tag:
| kubectl label namespace default istio-injection=enabled |
You will see namespace/default labeled if the tag was successful.
For now, there are no pods in the default namespace. Let us deploy a demo application to see the automatic sidecar injection in action.
Step #3: Deploy the demo application (Bookinfo)
Istio provides a demo application named Bookinfo, which has a few Bookinfo services, their corresponding service accounts, and deployments.
Now, run the following command to deploy bookinfo.yaml:
| kubectl apply -f samples\bookinfo\platform\kube\bookinfo.yaml |
You will see the following pods being deployed in the cluster when you run kubectl get pods
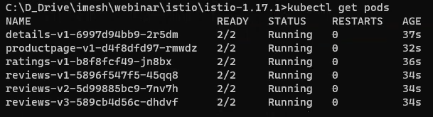
Note: Now 2 containers are running inside the pods (see 2/2 under READY). One is the application itself; the other is an Envoy proxy automatically injected into the pod by Istio.
You can also see all the services deployed by running kubectl get service

By default, the applications that are deployed in the cluster cannot be accessed externally or from outside the cluster. For that, we will have to expose the application by deploying the ingress gateway.
Step #4: Deploy the ingress gateway and access the application from outside the cluster
In the demo application- Bookinfo, you will find an existing Istio ingress-gateway called bookinfo-gateway.yaml (manifest below).
| apiVersion: networking.k8s.io/v1 kind: Ingress metadata: name: gateway annotations: kubernetes.io/ingress.class: “istio” spec: rules: – http: paths: – path: /productpage pathType: Exact backend: service: name: productpage port: number: 9080 – path: /static/ pathType: Prefix backend: service: name: productpage port: number: 9080 – path: /login pathType: Exact backend: service: name: productpage port: number: 9080 – path: /logout pathType: Exact backend: service: name: productpage port: number: 9080 – path: /api/v1/products pathType: Prefix backend: service: name: productpage port: number: 9080 |
Run the following command to deploy ingress gateway:
| kubectl apply -f samples\bookinfo\networking\bookinfo-gateway.yaml |
Once the gateway is deployed successfully, you can get the external IP by using the below command:
| kubectl get svc istio-ingressgateway -n istio-system |
It will return the following details about the gateway, including the external IP:

To access the application, we need to use `http://
Here, accessing the link `http://20.121.167.181/productpage` from the web browser will open up a page like this:
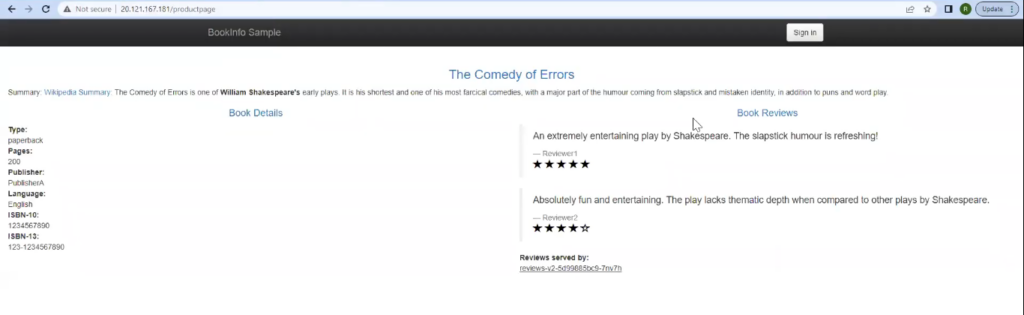
Note: If you look at the pods deployed in the cluster, you see that we have three versions (v1, v2, v3) for reviews. So, when you refresh the page, you will see changes in the reviews section.
Step #5: Visualize service graph using the Kiali dashboard
So, Istio has been deployed successfully, and applications are working fine. Now, we can use the Kiali dashboard to visualize the traffic flow between pods and understand the dependency and topology graph. For that, we will need to deploy a few add-ons.
Run the following command to deploy the add-ons:
| kubectl apply -f samples/addons |
It will deploy Kiali, Grafana, Prometheus, and a few other services.
Once they are deployed, use the below command to open the Kiali dashboard:
| istioctl dashboard kiali |
The above code will return a URL as you see below, which can access the dashboard:

Accessing the URL from the web browser will open the dashboard with all the namespaces:
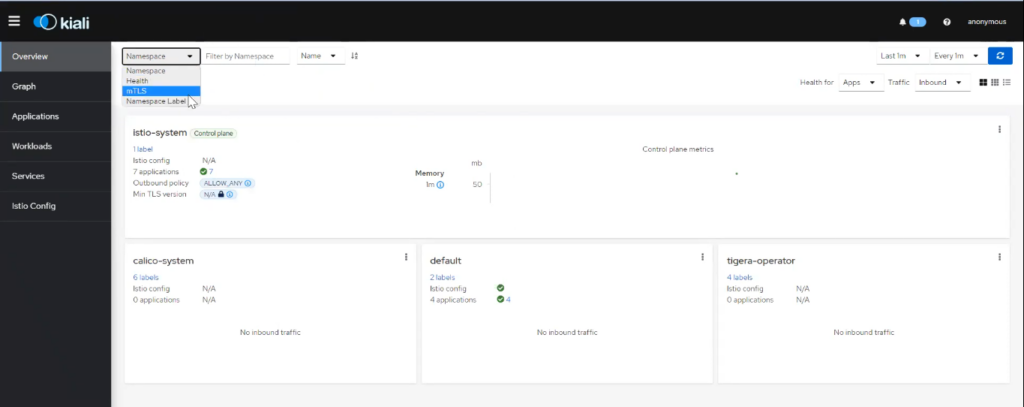
To see the service graph and visualize the traffic flow between services, you can go to “Graph” and then select the “default” namespace where we have deployed the applications.
It will open a service graph where you can see the request coming from ingress to the product page, which then flows to other microservices:

IMESH for a seamless enterprise Istio adoption
What we have seen here is a simple use case of Istio. We deployed Istio, a demo application, and visualized the traffic flow between services. In the real world, the network security logic required between microservices in a multicloud environment can be much more complex and granular. Istio can certainly help to do that. However, because of its steep learning curve, it can be challenging for developers, cloud engineers, and SREs/Ops teams to configure Istio in such cases. This is where IMESH can help.

The goal of IMESH is to help organizations with seamless Istio adoption without any implementation or operational hassle. We make it easier to deploy Istio into production and ensure there are no unintended container crashes or application misbehavior. IMESH also provides a strong visibility layer on top of Istio, which provides Ops and SREs with a multicluster view of services, dependencies, and network traffic. If you are interested, please talk to an Istio expert or book an Istio demo.