

Introduction
Many large enterprises like retail and banks are adopting open-source Istio service mesh to abstract and better manage the security and network of microservices. To either tackle cost, achieve HA/DR, or improve latency, they apply multicloud and multi-cluster strategies in their production system.
Implementing Istio in multicloud environment can be tricky, and architects often take time for experimentation. In this blog, we will discuss various ways to achieve multicloud and multicluster configuration for Istio implementation and also guide you through the steps to set up primary-primary multicluster Istio in EKS and AKS
Multicluster Istio deployment models
Istio can be configured by deploying it into single or multiple clusters, same or different networks, single or multiple control planes, or single or multiple meshes. To achieve HA/DR or improve latency, Istio is deployed into multiple clusters. There are four popular deployment models for deploying Istio to attain HA/DR and make seamless service discoverability in your production systems.
Istio Deployment models
- Primary-remote on the same network: One Istio control plane is deployed in one or more cluster(s) (or called Primary) and serves as a master. All other clusters (referred to as Remote) can be brought under the control of master Istio.
- Primary-remote on different networks: Primary-Remote setup with clusters in a different network, i.e., different zone or multicloud.
- Multi-primary on the same network: Each cluster in the production system will have one Istio control plane, but they will all be connected and aware of each other. Note that there can be multiple remote clusters for each primary cluster. Refer to Fig A.
- Multi-primary on different networks: Multi-primary setup for clusters in different zones/regions or multicloud clusters.
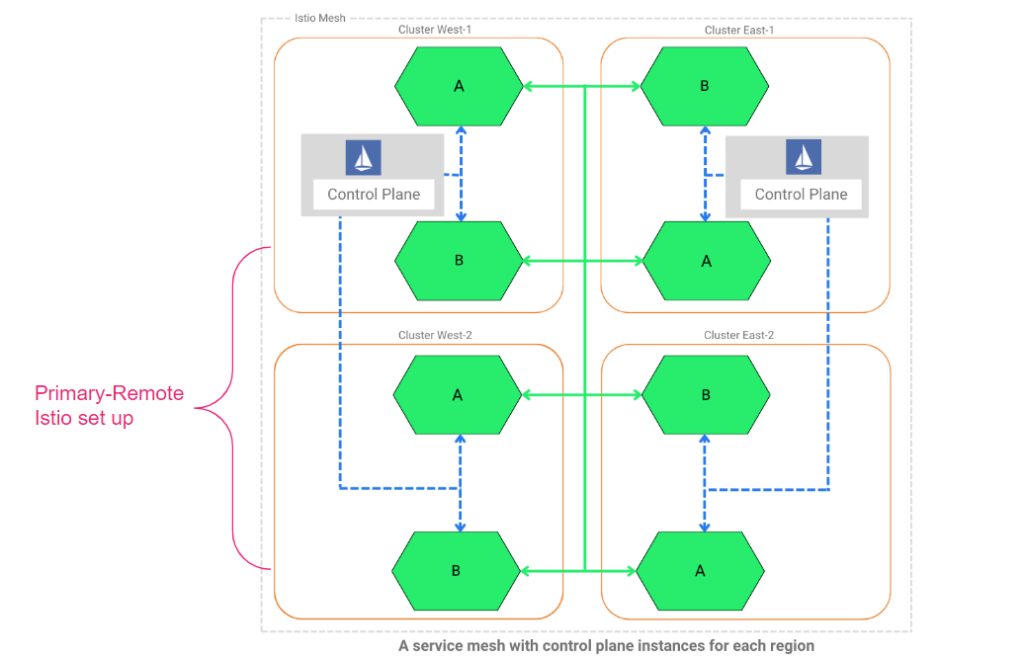
Fig A: Depiction of Istio configured in both Primary-primary and Primary-remote style.
We had discussed setting up Istio in the Primary-remote cluster in GKE and AKS earlier. In this blog, we will focus on the Multi-Primary Istio setup.
Architecture to set up Multi-primary Istio in multicluster landscape
The way to achieve multi-primary Istio setup is to install Istio control planes in each cluster (as shown in Fig B) and then have these clusters access to the API server of each other. Thus, there will be a single service mesh (although different Istio control planes), and the service discovery will be seamless in the mesh. The Istio control planes don’t interfere with each other, so the failure of one Istio control plane will not affect other primary clusters.
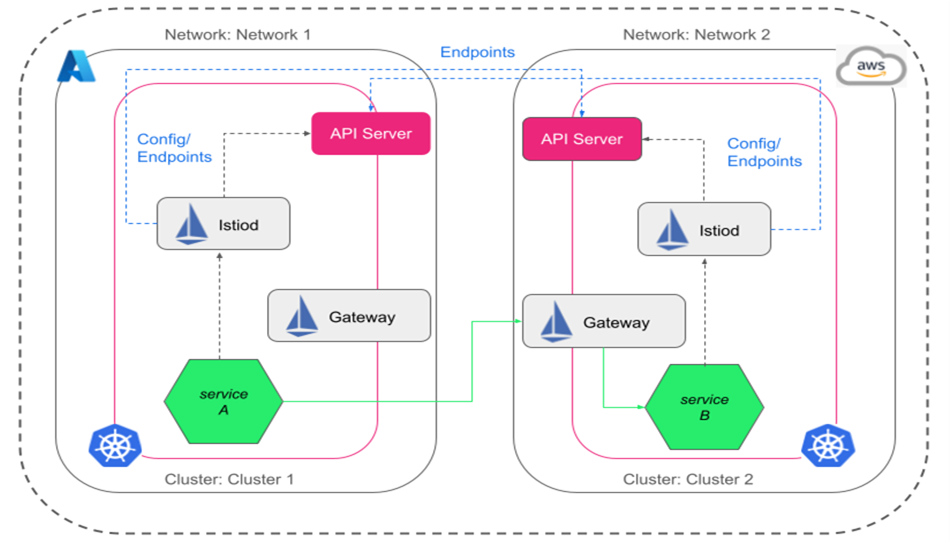
Fig B: Multi-primary Istio set up in AKS and EKS.
Benefits of Multi-primary Istio
Key benefits of setting up multi-primary Istio are:
- Improved availability: If a control plane fails, the damage will be limited to workloads or data plane managed by that control plane.
- Configuration isolation: Configuration can be made to one cluster, zone, or region without impacting others.
- Canary or blue/green deployment: You have more fine-grained control over configuration rollout, such as canary or blue/green, by deploying them into a sub-section of the mesh only.
- Controlled visibility and access with RBAC: Since all the services in multiple clusters can brought under one mesh with a multi-primary setup, you can implement fine-grained authorization for the developer and DevOps team worldwide. You can define the least privilege for access to a particular cluster or service in the whole mesh from a central point. Note that you have to create and deploy authorization policies in each primary cluster, which will be applied by the master control plane.
Steps to configure multi-primary Istio in EKS and AKS
We will discuss a step-by-step guide to configure multi-primary Istio in this section. If you are interested, you can watch the complete video:
Pre-requisite
- Use certificates issued by the same Root CA- an essential step to establish trust between the two clusters. Since Istio generates its certificates, two Istiod in respective clusters will have their version of the certificate, and clusters cannot trust and communicate with each other. For enterprise usage, it is recommended to keep the Root certificate secured and safe, say in Vault.
- Have two separate clusters in different networks. We have considered EKS and EKS clusters for the multi-primary setup.
You can access all the Git multi-primary Istio yaml files.
Step1: Create the root certificate and cluster certificate
Step 1.1: You can run the following command to generate the common root certificate. We have used Istio tools.
make -f istio-1.20.3/tools/certs/Makefile.selfsigned.mk root.ca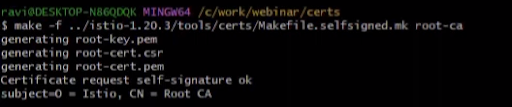
Step 1.2: Now you can create cluster certificates by running the following command. We have named our certificate as webinar-cluster and eks-cluster.
make -f istio-1.20.3/tools/certs/Makefile.selfsigned.mk webinar-cluster-cacertsmake -f istio-1.20.3/tools/certs/Makefile.selfsigned.mk eks-cluster-cacerts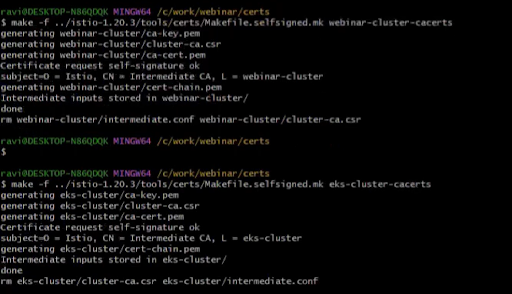
Step 2: Create namespace in each cluster and create secrets from the certificates
Step 2.1: We have created a namespace called istio-system in AKS and EKS clusters. We have used aks-primary-namespace-prep.yaml, and eks-primary-namespace-prep.yaml to create them.
Command:
kubectl create -f aks-primary-namespace-prep.yaml –context=$AKS
kubectl create -f eks-primary-namespace-prep.yaml –context=$EKS
Step 2.2: We will create secrets for istio-system namespace in each cluster by running the command:
kubectl create secret generic cacerts -n istio-system –context=$AKS\
–from-file=certs/webinar-cluster/ca-cert.pem\
–from-file=certs/webinar-cluster/ca-key.prem\
–from-file=certs/webinar-cluster/root-cert.pem\
–from-file=certs/webinar-cluster/cert-chain.pem

kubectl create secret generic cacerts -n istio-system –context=$EKS\
–from-file=certs/eks-cluster/ca-cert.pem\
–from-file=certs/eks-cluster/ca-key.prem\
–from-file=certs/eks-cluster/root-cert.pem\
–from-file=certs/webinar-cluster/cert-chain.pem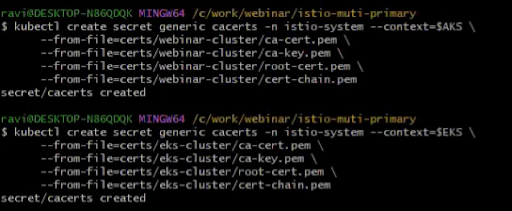
Step 3: Install Istio using HELM
Step 3.1: Add the HELM repo by executing the following commands.
helm repo add istio https://istio-release.storage.googleapis.com/charts

helm repo update
Once helm repo is updated, we will install Istio, using HELM, in each cluster, in 3 sequential steps- first install Istio-base, then Istiod, and finally east-west gateway.
Step 3.2: Please follow the below commands to install istio-base to istio-system namespace of each cluster. We will install first in AKS and then in EKS ( but you can choose to run the commands parallelly as well).
helm install istio-base istio/base -n istio-system –kube-context=$AKS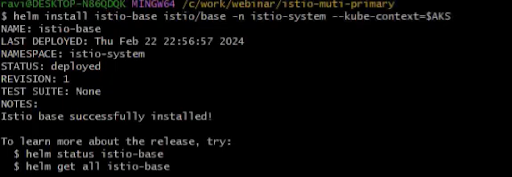
You can now install istio-base in EKS cluster by running the following sets of commands.
helm install istio-base istio/base -n istio-system –kube-context=$AKSNow, you can install istiod by running the following commands.
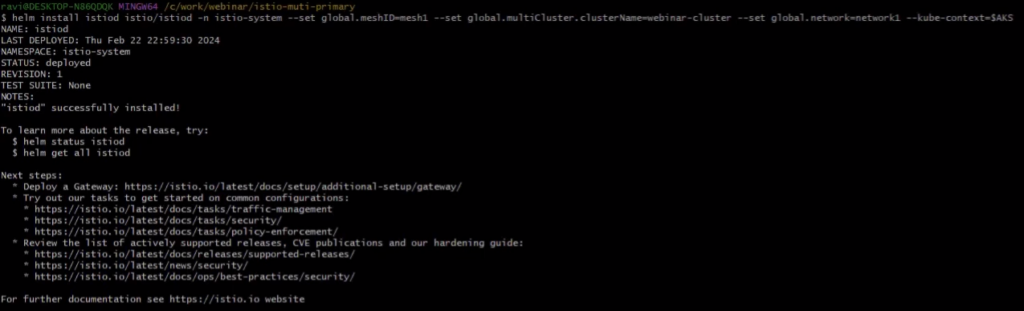
helm install istiod istio/istiod -n istio-system –set global.meshID=mesh1 –set global.multiCluster.ClusterName=webinar-cluster –set global.network=network1 –kube-context=$AKSYou should see an output like below.
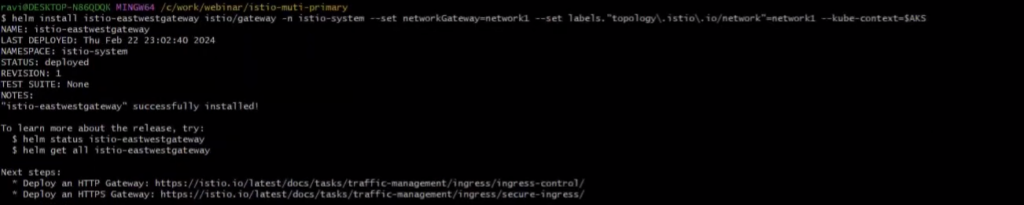
Now, we need to install east-west gateway using the following command:
helm install istio-eastwestgateway istio/gateway -n istio-system –set networkGateway=network1 –set labels.``topology\.istio\.io/network”=network1 –kube-context=$AKS
You should see an output like this:
Run the below commands to install Istio-base, istiod, and east-west gateway in EKS.
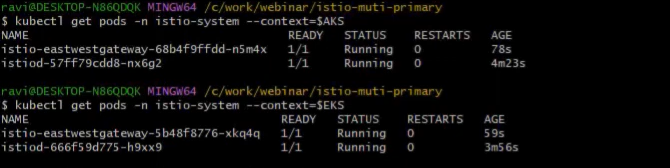
helm install istio-base istio/base -n istio-system –kube-context=$EKShelm install istiod istio/istiod -n istio-system –set global.meshID=mesh1 –set global.multiCluster.ClusterName=eks-cluster –set global.network=network2 –kube-context=$EKShelm install istio-eastwestgateway istio/gateway -n istio-system –set networkGateway=network2 –set labels.``topology\.istio\.io/network”=network2 –kube-context=$EKSYou can verify if the installations are proper and check the pods in istio-system namespace in each cluster.
Step 4: Established the trust between two primary clusters- EKS and AKS
Step 4.1: In this step, we will create a gateway resource in each cluster so that communication can happen between them via eastwest gateway. Refer the expose-services.yaml.
apiVersion: networking.istio.io/v1alpha3
kind: Gateway
metadata:
  name: cross-network-gateway
  namespace: istio-system
spec:
  selector:
    istio: eastwestgateway
  servers:
    - port:
        number: 15443
        name: tls
        protocol: TLS
      tls:
        mode: AUTO_PASSTHROUGH
      hosts:
        - "*.local"
You run the following command to create eastwest gateway resource:
kubectl apply -f expose-services.yaml –context=$AKS
kubectl apply -f expose-services.yaml –context=$EKS
Step 4.2: To start the secure communication, we need to create a secret and access the API server of each cluster to the other.
We can execute the following command to create a secret in AKS and apply it in the EKS.
istioctl create-remote-secret –name=webinar-cluster –context=$AKS > aks-api-server.yaml

istioctl create-remote-secret –name=eks-cluster –context=$EKS > eks-api-server.yaml
We can now apply the secrets in respective clusters by executing the following commands:
kubectl apply -f aks-api-server.yaml –context=$EKS
kubectl apply -f eks-api-server.yaml –context=$AKS
By now, we have established the trust between the two cluster and communication now happen using Istio eastwest gateway. We will verify the communication by installing a few services in the next step.
Step 5: Verify and validate the multicluster communication in multi-primary Istio setup
We will create a new namespace (say test) in each cluster and make it Istio-enbaled. We will deploy services in test namespace in each cluster and initiate communication.
Step 5.1: We will create a new namespace in each cluster.
kubectl create ns test –context=$EKS
kubectl create ns test –context=$AKS
Then we will lable the test namespace in each cluster as Istio-enbaled.
kubectl label ns test istio-injection=enabled –context=$AKS
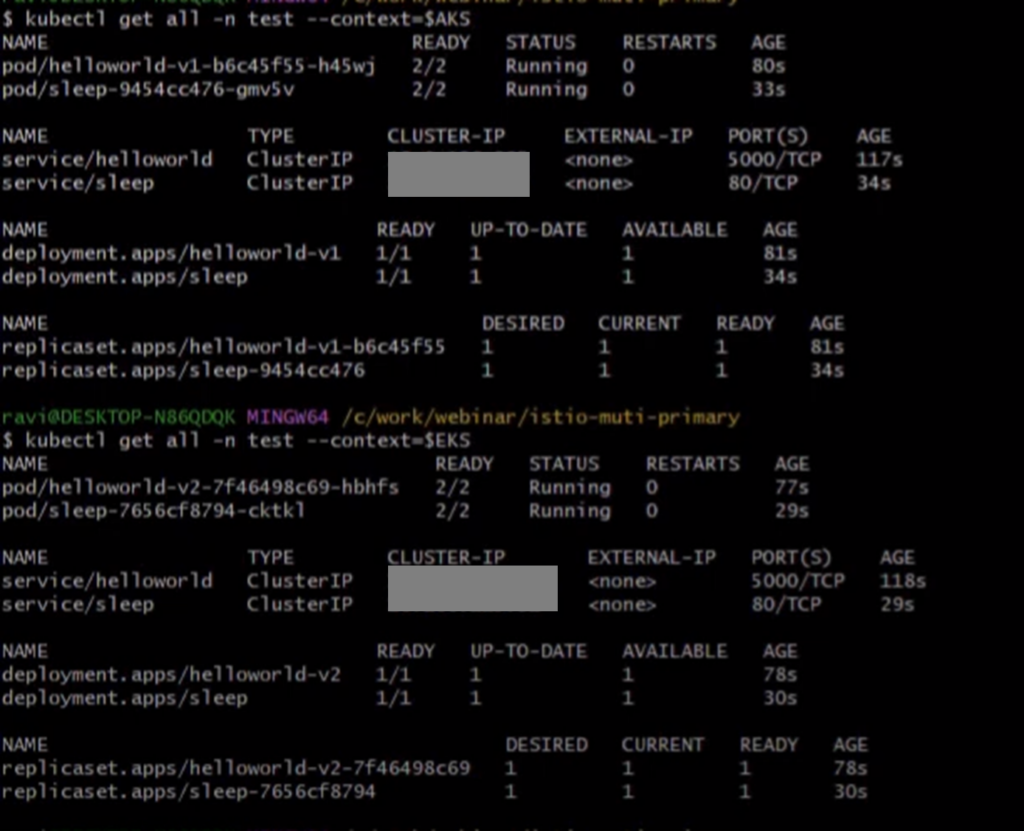
kubectl label ns test istio-injection=enabled –context=$EKSStep 5.2: We will deploy the helloworld-deployment-v1 yaml in AKS, helloworld-deployment-v2 yaml in EKS, and hello-world service in both clusters, respectively. We will also deploy sleep.yaml to curl the application and test the communication.
Execute the command to deploy the helloworld and sleep services in AKS and EKS, respectively.
kubectl apply -f helloworld-service.yaml -n test –context=$AKS
kubectl apply -f helloworld-deployment-v1.yaml -n test –context=$AKS
kubectl apply -f helloworld-service.yaml -n test –context=$EKS
kubectl apply -f helloworld-deployment-v2.yaml -n test –context=$EKS
kubectl apply -f sleep.yaml -n test –context=$AKS
kubectl apply -f sleep.yaml -n test –context=$EKS
Verify if all the pods and services are created, and your output should look something below:
Step 5.3: We will verify the communication by sending curl request from one of the sleep pods in AKS. You can run the following command to get into one of the sleep pods in AKS.
kubectl exec it <> -n test –context=$AKS To curl helloworld in AKS and EKS clusters from sleep pod in AKS, we need to execute the below commands:
curl helloworld:5000/helloYou should get a response from the Helloworld service in the AKS and EKS cluster as well. Here is the output. Helloworld service responds from V1 and V2 deployments in AKS and EKS clusters.
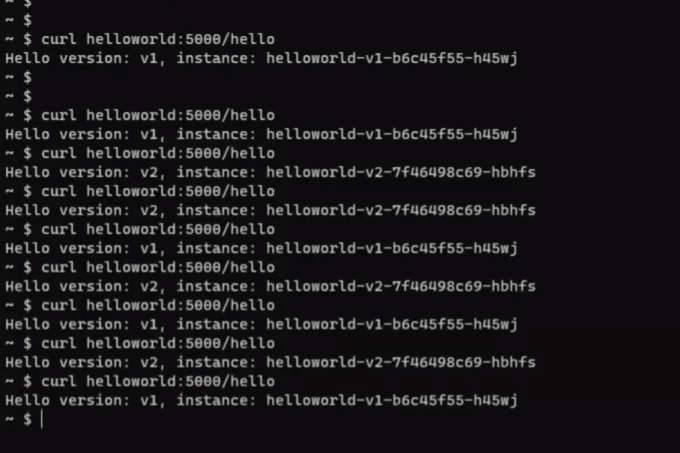
Step 5.4: Similarly, if you try to get into a sleep pod in the test namespace in EKS cluster and try to curl helloworld service, then you would get a response from the hello-deployment V1 and V2 deployed in AKS and EKS cluster.
Common questions wrt Istio Multi-primary implementation
- How is multi-primary different from implementing Istio into individual clusters?
If Istio control plane is implemented individually, they will communicate with each wrt load balancing or traffic handling. In each of these scenarios independent Ingress will be responsible for executing the task. Additionally, we will require an external load balancer to distribute the traffic.
Another problem is service discovery will not happen. Services in cluster-1 (or say mesh-1) will not be aware of the Services running in cluster-2 (say, mesh2). In that case, developers must right separate logic to handle the communication.
- Can we not handle the HA case of Multi-primary using Primary-remote?
Yes, you can handle but the risk of the primary-remote is that if the control plane fails in the primary cluster, then all the network and security policies implemented in the data plane in the cluster-2 (remote cluster) will stop working
Next step
If you want to implement Istio in large enterprises with numerous microservices across public or private cloud or VMs, then IMESH can help you. IMESH provides hassle-free Istio enterprise support to help large and medium organizations adopt Istio in production.
Contact us for enterprise Istio support today. Check out our pricing.


How does the sleep.yml is configured? and how are the requests loadbalanced between v1 and v2? please explain?
Please refer to GitHub repo for all manifests https://github.com/imesh-ai/webinar/tree/main/Multi-primary%20Multicluster%20Istio.
You can deploy sleep by running `kubectl apply -f sleep.yaml -n test`.
Furthermore, in this case, load balancing is done by envoy, as sleep workload is istio enabled.